Thursday, August 19, 2010

Lemon-Ricotta Cheese Cookies

Lemon-Ricotta Cheese Cookies


Lets just sat I took the summer off. Period. :)

But now that I am back... and have one and half weeks of summer vacation (between summer classes and fall semester starting) I am taking the advantage to bring you something yummy. I am not a huge fan of cookies. I am more of a cake kinda girl. But these, these are different. They are so moist and they just taste more like tea cakes than a cookie. If you like lemon, these are especially delicious. The interesting fact is that these have an entire container of ricotta cheese in them. Who would have ever thought??? I don't know about you, but I like them. So doesn't my mother-in-law, which you know is always good. :) Make them, and bring some to your mother-in-law, she will love you too.

On a side note, we got a spanking new camera along with a super-duper lens. I absolutely positively love shooting photos with it. I have also started editing some photos. All the photos before were unedited. I feel like it brings out the true color and texture of the food. Therefore, this blog-post has taken me much longer. Please don't just sit there... but tell me what you think, or I might just take a "fall break" too. :)

Here they are..... Lemon-Ricotta Cheese Cookies........
Adapted from Food Network


You will need:

  • 2 1/2 cups all-purpose flour
  • 1 teaspoon baking powder
  • 1 teaspoon salt
  • 1 stick unsalted butter, softened
  • 2 cups sugar
  • 2 eggs
  • 1 (15-ounce) container whole milk ricotta cheese
  • 3 tablespoons lemon juice
  • 1 lemon, zested

1. Preheat the oven to 375 degrees F.


2. In a medium bowl combine the flour, baking powder, and salt. Set aside.

3. In the large bowl combine the butter and the sugar. Using an electric mixer beat the butter and sugar until light and fluffy, about 3 minutes.
4. In the meantime, let your toddler mix around your flour mixture.....
.... and grate up the zest of one lemon.
5. Add the eggs, 1 at a time, beating until incorporated.
6. Add the ricotta cheese, lemon juice, and lemon zest. Beat to combine.
Your batter will look curdy.... don't worry about it.

7. Stir in the dry ingredients just until incorporated.
8. Line 2 baking sheets with parchment paper. Spoon the dough (about 2 tablespoons for each cookie) onto the baking sheets.
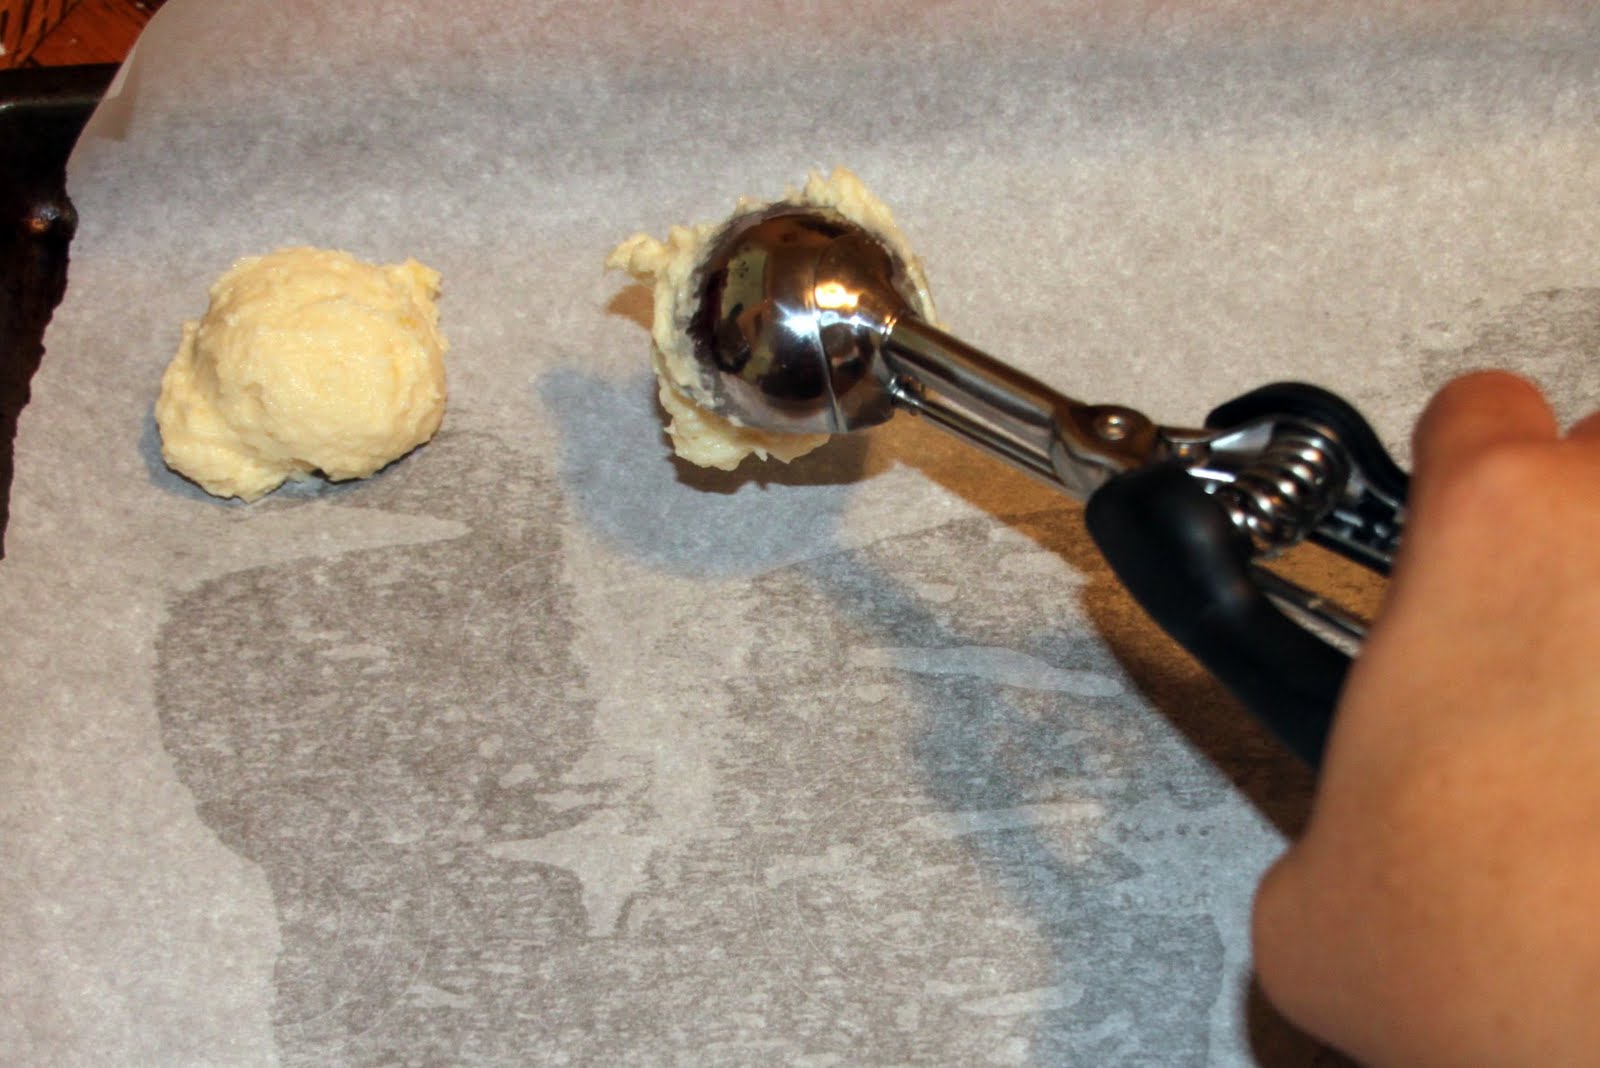
I got about 30 cookies.
9. Bake for 15 minutes, until slightly golden at the edges. Remove from the oven and let the cookies rest on the baking sheet for 20 minutes.
10. Now you can optionally make the glaze to pour on top of the cookies or simply dust the top with powdered sugar if your not into glaze. To make the glaze you need the zest and juice of one lemon, plus 1 1/2 cups powdered sugar. Just mix it all together.
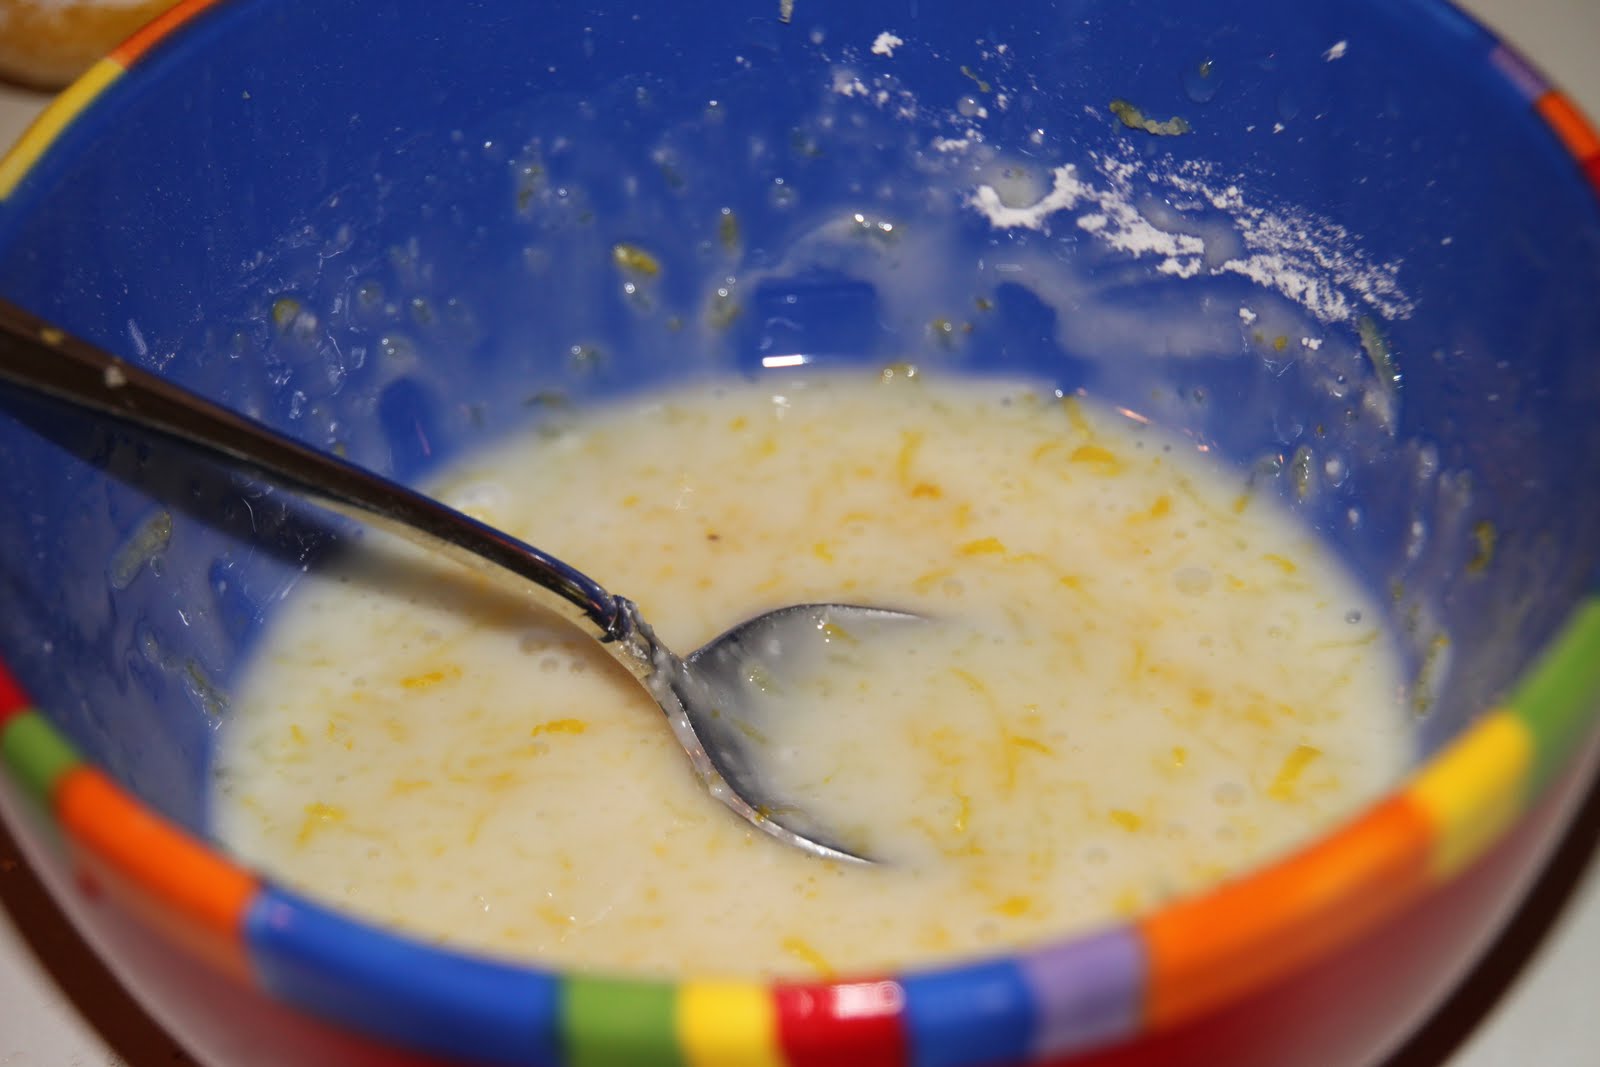
11. And pour about 1/2 teaspoon on each one letting it drip to the sides. I like to put the parchment paper I used to bake the cookies on underneath, that way whatever drips off can be on the paper that I can just toss.
You also need to let the glaze harden a bit before serving. Enjoy.

Thursday, July 22, 2010

I am BACK. Sort of.

Dyatlovo, Belarus 2010


Hello.... Hello??? Anyone there???? Today I was wondering if I should even get back to this. I promised you all 1 month an am back 2 months later. Forgive me, please??? You see... I left to Belarus for our mission trip with Zhenya for three weeks... having another awesome opportunity to serve my God.... and then unexpectedly we sold our camera there. Belarus was so much fun. As much as I contemplated for 1/2 a year on leaving Leah here withous us for 3 weeks I do not regret going. Tent camp was hard and completely different from the other times I had gone to Belarus but the kids loved it and heard about God and His love for them, which is all that mattered. Among being involved in all the other activities in the camp, my responsibility was craft time with the kids. The kids and I both enjoyed it.

It was so awful to leave after the first camp. Zhenya and others tried to convince me to stay, but I felt that it was time to go back to Leah.... This was the last picture we took before all the kids left home. I miss them all very much.


Now back to the camera......My baby (the camera, lol....) was gone and I had nothing to return home with. No pictures (that I took) or camera. I am glad my "photo-obsessed" friend Vik was in our camp, otherwise we would have no pictures. So... at the same time this was a goo time to sell our camera as Zhenya and I both really wanted a newer one.... oh and the fact that I lived at my parents' house for a month after comming back from Bealrus (since Zhenya didn't come back until a week ago) and I really didn't cook much. Just a time here and there. Or maybe just 3 times... lol. My mom was ready to kick me out.... :) but we survived. All in all, I am back and not with new pictures or anything but to say Hello and see if anyone is out there. Also, on a very exciting note we bought a new camera which arrived in the mail yesterday.
Get ready for this...... Canon T2I.
Yep. Soooooooo exciting. So.... I hope to take pics very soon and post something yummy and scrumpcious for you. While I was at my mom's I did make PW's Summer Stir Fry and oh boy was it light and summery and delicous. Make it.

Wednesday, May 26, 2010

Individual Rhubarb Tarts

I have to confess. I have a new obsession and it's not vanilla beans. Rhubarb. Yum. Have you ever seen these pretty pink stalks at the grocery store? It looks like celery except a pretty pink. How could you not like anything pink? It was funny because one day as I was grocery shopping I came upon some rhubarb and was like... hm, this is a vegetable but I remember seeing it in a dessert recipe...??? I didn't end up buying any but immediatly went home and googled it. I came upon a million recipes which call for rhubarb, mostly desserts and baked goods. They all looked amazing. So... I chose to make a simple sponge cake and fill it in the middle with some cooked rhubarb and strawberry mix. It was sooooooooooooooo delicious. The next day I was back at the store for more rhubarb. I needed to make sure to try at least a few more recipes with this wonderful spring veggie while it's in season. Many recipes pair the tart rhubarb with sweet strawberries. This creates a wonderful tangy and fruity taste. Last weekend I made Rhubarb Crumb something.... from my Williams and Sonoma baking book. Paired with some vanilla ice cream, and I was in heaven. Lets just say, I love everything about rhubarb. I decided to share a recipe with you that I adapted from Joy of Baking. Individual Strawberry Rhubarb Tarts.


On a side note, I will not be blogging for at least three weeks as I am leaving to Belarus tommorow. Please pray for my husband Zhenya and I, and for the rest of our Hand in Hand group. Pray that the kids open up their hearts to God's Word and that we are prepared to share it with them.


**** Side note: I am now finishing this three days later and in an huge apartment on he 15th floor in Kiev, Ukraine. During my blogging the night before we flew out a thunderstorn hit my in-laws house causing power outages and a tree in the yard as well as on my sister in law's car. What a huge mess!!!! Thank you GOD for being merciful to us!!! ***


Individual Strawberry Rhubarb Tarts
Adapted from Joy of Baking

You will need:

For Pastry Crust:

*2 1/2 cups flour

*1 teaspoon salt

*1 tablespoon white sugar

*1 cup unsalted butter, chilled, and cut into 1 inch pieces

*1/4 to 1/2 cup ice water

*Filling (see below)

1. First make the crust. In a food processor or electric mixer, place the flour, salt, and sugar and process until combined.

2. Add the butter and process until the mixture resembles coarse meal (about 15 seconds).
3. Pour 1/4 cup (60 ml) water in a slow, steady stream, through the feed tube until the dough just holds together when pinched.
4. Add remaining water, if necessary. Do not process more than 30 seconds.

5. Turn the dough out onto your work surface and gather it into a ball.
6. Divide the dough into two equal pieces,flatten each portion into a disk, cover with plastic wrap, and refrigerate for 30 minutes to one hour before using. This will chill the butter and allow the gluten in the flour to relax.


For Filling:

*1 pound rhubarb cut into 1 inch pieces (approximately 3 cups)

*1 pound fresh strawberries, cut into 1 inch pieces

*1/4 - 1/3 cup flour

*3/4 - 1 cup white sugar

7. In a large bowl, combine the cut up rhubarb, cut strawberries, flour, and sugar.

8. Once the pastry has chilled sufficiently, remove the two disks of pastry from the refrigerator and divide each disk into four equal portions (you will have eight portions altogether).
9. On a lightly floured surface, roll each portion of pastry into a 7 inch (18 cm) circle.
10. Place approximately 1/2 - 3/4 cup of filling in the center of each pastry circle, spreading the filling out to about 1 inch (2.54 cm) from the edge of pastry.

11. Gently fold the edges of the pastry circle up and over the filling, leaving the center of the tart open. Press the edges gently so the pastry sticks together. Once all the tarts are assembled, cover and return to the refrigerator for about 15 - 30 minutes to chill.


12. Meanwhile, preheat the oven to 400 degrees F.
13. Bake the tarts for approximately 25-30 minutes or until the crust is golden brown and the juices are bubbly and starting to run out from the center of each tart.
14. Remove from oven and place on a wire rack to cool before serving. Serve with softly whipped cream or vanilla ice cream.
Enjoy!!!!!

Wednesday, May 19, 2010

Red Pepper Risotto

I loove Italian food. I think I have mentioned this before. I am sure I have mentioned this before, but why not remind you of it. Rice on the other hand isn't in my top 10 favorite foods. I do like fried rice, the Chinese way, but white or brown rice by itself, not so much. Unless its sushi, but does that count??? This was until I made risotto. Yum. Have you ever tried it? It is a dish of rice that has been cooked differently from any other rice. You need some patience to cook it and can't quite walk away from the stove as you would when making regular rice. I also couldn't cook it in my rice cooker. Bummer. But it is oh so worth it. If you are Russian you know what "Risovaya Kasha" tastes like.... It is cooked by adding a little milk at a time until the rice is soft and has lost all of it's firmness. Well, this is KIND OF like that, except it is not a sweet dish and still has a bite to it. This specific risotto recipe also includes white wine which I think makes almost anything better, if you are into that sort of thing. Please, if you don't like "Kasha" don't automatically assume you won't like risotto. You could also make risotto with many different ingredients. This one calls for red peppers. I have seen some with dried tomatoes and basil. Whatever you like. The original recipe also calls for goat cheese which I am also not a fan of. If you are though, please feel free to use the original recipe.

Red Pepper Risotto
Adapted from Ree Drummond
You will need:
  • 4 cups Chicken Broth, Low-Sodium
  • 2 Tablespoons Olive Oil
  • ½ whole Medium Onion, Diced
  • 1 whole Red Bell Peppers, Diced
  • 1 cup Arborio Rice
  • 1/3 cup Dry White Wine
  • Salt To Taste
  • 1/2 cup shredded Mozzarella cheese
  • ½ cups Grated Parmesan

1. First start off by finely dicing your red pepper and 1/2 of an onion.
2. In the meantime, drizzle about 2 tablespoons Olive Oil into a pot and let it begin to get warm on medium heat.
3. In a second pot, pour in your 4 cups of chicken broth and let it come to a simmer. Turn it off an let it stand there.
4. After you have diced the onions, thrown them into the pot with the oil and let them cook for about 2 minutes or until translucent.
5. Now throw in your diced red pepper and let it cook for another 8 minutes stirring every once in a while.


6. When the red peppers have become softer, after about 8 minutes or so, throw in your cup of Arborio rice. Make sure that is it Arborio rice. I don't believe risotto will turn out the same with a different kind of rice.
7. Stir the rice and vegetables and let them cook for about a minute before we start adding liquid.
8. Now, if you are into wine flavored dishes, pour in about 1/3 of a cup of white wine and let it cook for a minute or two. Turn the heat to medium-low.
Okay. Now. This is how you make risotto. You gradually add in ladles of hot broth, stirring after each addition until the rice has absorbed the liquid. You repeat this process until the rice is done

9. To begin, add enough broth to almost cover the rice—about a cup or so.

10. Stir it around until the liquid is fully absorbed…

Like this.....
11. Then add in another cup or so of broth.
12. Stir it around gently while the rice absorbs the liquid…
13. And when the liquid is all absorbed… add more and repeat the process about 25 minutes. You might not need to use all of the broth. Try the rice and see if it is cooked with a little bite to it.

14. Finally when all the broth has been absorbed, thrown in about 1/2 cup of the shredded cheese and another 1/2 cup of the grated cheese.
15. And stir it all until it's melted. Turn off the heat.
16. Now my friends, you have made risotto and you could open and Italian restorante.

Well... maybe not just yet. But soon.

17. I like to add a bunch of fresh milled pepper to my risotto....

... and serve it next to Ina's Baked Shrimp Scampi.


Whatever you choose to serve it with, enjoy!!!!